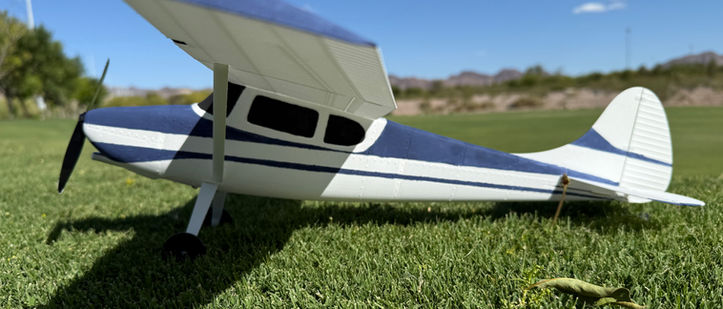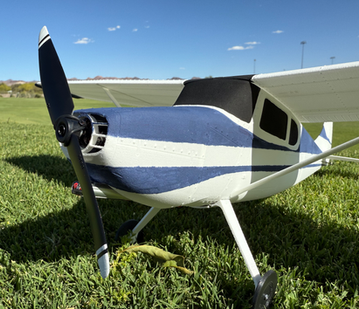


CessnA 170
This is my 3D printed Cessna 170 aircraft I designed to be ultra-lightweight, ultra-scale, fly fantastically and be easy to print. Your new favorite indoor model! Minimum Build Volume required is 200x200x200. RTF weight: 75 grams LWPLA ONLY Wingspan: 630mm Length: 485mm Print time: 15hrs I have a full step by step assemble video on my YouTube channel. Watch below. Keep scrolling to see more features of the Cessna 170.
$35.00 USD


Wingspan: 630mm
Length: 485mm
RTF weight: 75g Print time: 15hrs
1x 1106 Brushless Motor
1x 5A/1S ESC
2x 1.7g Servos
3 Channels
Specifications:
Build Video
This is my build video for the Cessna 170. This plane truly means so much to me and I am so excited to finally be able to share it with you all. When I first got into the hobby I tried to convert a balsa Guillow's kit into RC. I had no idea about the significance of weight, ESPECIALLY in a small scale model. So I added strobes and wrapped it with a cool paint scheme. You can imagine the result. I learned more about the significance of weight and then discovered 3D printing. I was still eager to get this small scale Cessna to fly so one of the first designs I attempted to draw in CAD was a Timber. It was, again, a brick. I crashed and rebuilt that plane more times than I can count. Fast forward years later and here we are. I've drawn up a few planes, I am lot better at using a 3D printer and have finally, finally, finally made my dream Cessna 170. This plane is so ultra light, and ultra scale. It is easy to fly and easy to assemble. It is the perfect little plane to take out and fly anywhere. Its small weight is below the FAA weight restriction so this could be flown at the park on a nice day. It would also be a fantastic project for indoor flying. Can't wait for you all to try this. Happy flying, Troy.

Printer settings Are Key Here
When a plane is this small, more than ever your printer settings need to be perfect. Every make/model of 3D printer prints slightly different from another, and each maker of LWPLA will have some differences in their plastic. From what I've found, tinkering with your flow rates will be the main thing you will have to do to get perfect parts with this build. You don't want it to be too flimsy, not too solid, just right. As you can see from the parts in this picture, I saved 4g just spending a little time adjusting the settings. The wing is made of 4 parts so I saved a total of 16g just on the wing and with a model that only weighs 75g that is over 20% savings for just the wing. If you add in adjusting the fuselage it is around 35%. Not only does adjusting your settings keep the RTF weight down but it is also important for setting the CG. Most of the printed material is aft of the CG point, so if your weights are too heavy you will have a tail heavy plane and will need to add extra weight to the nose to set CG. On one of my first prototypes I taped an extra battery to the nose just so the CG would be correct to fly the plane.

Double check the Weight
Did your part print correctly? In order to simplify the guess work, I provide a weights list for each part. These are your goal weights. I would just choose one piece and print it out a few times while testing your flow rates until you get as close as possible to the goal weight. Another tool you should consider adding to your kit, a pocket scale. I previously would have only used a kitchen scale but this micro scale can measure things so accurately and it's around 10$ from Amazon. See how different the weights come out here? I highly recommend this tool!
Getting Started
This plane requires a minimum build plate volume of 200x200x200.
I've been using this Bambu Lab X1 Carbon for a while and I still love it. I've gotten a lot of feedback that it can be tricky to print plane parts out on the Bambu Lab printer though so I made a quick guide to getting started on your plane prints. Check it out here.

You're ready to build!
Thank you for deciding to build the Cessna 170! I am so proud of this plane, I know you are going to have fun with it.
Make sure you check out my Build Tutorial, in the description you will find a complete parts list for building and assembly.
Happy printing! See you on the next build.


.png)